Set up your store
Guidelines to set up your online store.
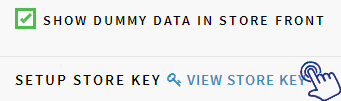
Show Dummy Data in Storefront:
Add a tickmark in this checkbox if you want to display dummy data of your store till your domain is not live.
Set up store key:
Keep your store password protected till you want to display the store to the public. To set store key:
-
Click on View Store Key.
-
Tick the checkbox "Lock my store and provide me store key" and write a password to lock the store and a message that would be visible to the customers who visit your store in respective fields.

- Click on "Save" button to create your store key and lock your store.
- If you want to unlock the store, please untick this checkbox "Lock my store and provide me store key" and click on "Save" button to allow customers to view your store.
Store Logo:
Click on “Choose file” and upload your store logo in JPG, PNG, BMP file that will appear throughout your website and invoices. The maximum size of the image can be 300px X 150px.
Store Favicon:
Favicon is your website's icon that appears on the browser tab. Click on “Choose file” and upload your store favicon in IOC file format. The maximum size of the image can be 32px X 32px.
Logo Position:
This field is mandatory. You can manage the alignment of your logo position from the drop dowm menu whether you want to display your store logo on left side or at center of the store.
Your Customer Care/Support Phone No:
This field is mandatory. Write a contact number on which the customers can make a call and get answers for their queries.
Invoice Settings
Invoice Prefix:
You can mention anything to be written before the Invoive Number.
Invoice No:
Mention the starting number from which you want to create invoices for the orders placed by the customers at your store.
Invoice Postfix:
You can mention anything to be written after the Invoive Number.
Invoice Billing Info:
Invoice Terms & Conditions:
Tracking & Analytics:
You can get a report to track your website traffic and analyze your business with the help of Google Analytics Setup. To set up Google Analytics:
-
Click on Google Analytics Setup

- Mention Google Analytics Code
- Mention Google Conversion ID
- Mention Google Conversion Label
- Mention Facebook Conversion ID
- Mention Facebook Conversion Audience Pixel ID
- Click on "Save" button at the bottom of the page.
Script Settings
Header Additional Scripts:
Footer Additional Scripts:
Site Verification:
Site verification means to verify the correct ownership of your domain with third parties like Google Webmaster, Bing and Pinterest. Click on "Site Verification" and mention the verification code for Google, Bing and Pinterest.
XML Sitemap:
Instagram:
Transactional SMS:
One Click Social Login:
-
Select “Store Set Up” from the left Menu
- Manage below settings
- Click Save.