Store Policies
Global Store Policies means setting of different policies for your e-commerce store.
To Manage store policies:
-
Select “Store Policies”
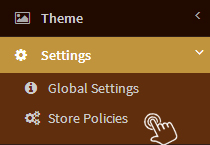
- Manage below settings
Language Settings (if available in your selected plan):
You can select available languages to be displayed at your store. To display your store in multiple languages, add a tick mark in the checkbox "Activate Multi-Language" and click Save. Now you can select available languages for your store.
-
Click on Manage Language.

- Tick the language name checkboxes for the languages supported at your store.
- Mention different Store URL as per your store language.
- Tick the checkbox "Admin Enabled" so that the admin can manage the store and make necessary changes in their selected language.
- Tick the checkbox "Store Front Enabled" once your store is ready in selected language for the customers.
- Click "Save" to display your store in multiple languages.
Currency Settings (if available in your selected plan):
You can select available currencies to be displayed at your store. To facilitate your customers buy the products from your store in their local currency, you can tick mark on the checkbox "Activate Multi-Currency" and Save. Now you can select available currencies for your store.
-
Click on Manage Currency

- Tick the checkbox for the currencies you want to display at your store.
- Write the currency conversion rate.
- Click "Save"
Ecommerce Settings:
-
Tick the checkbox "Enable ecommerce at my store" if you want to sell your
products online. If you untick the checkbox "Enable ecommerce at my store" the customers will not be able to buy the products displayed on your store. -
Tick the checkbox "Hide Product Price" if you only want to display
your catalogue online. The images of your products will be displayed but the prices will not be visible to the customers.
Newsletter Settings:
If you wish to send newsletters to your subscribers or customers. You can enable this option. Tick the checkbox "Show subscribe for newsletter". It will be displayed Newsletter Subscription option at your store front. Also when user will register on your store, it will ask user permission for newsletter subscription.
Product Settings:
Mention the number of products you want to display in any category on it's first page. You can display upto 99 products per page.
Related Products Settings:
By default, system will auto select related products as per collection, however if you want to choose related products manually tick the checkbox "Show related products chosen manually".
Product Color Variant Settings:
Tick the checkbox "Show product color variants" to display images of all the colour variants available for any product at your store.
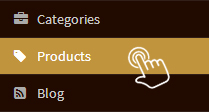
To display Product Color Variants with images:- Add available colours of any product with their images as a seperate product.
-
Select "Products" option from the left Menu
-
Click “Add Colour” for the product that has colour variants

-
Select the Product color variant from the drop down menu for available color variants.
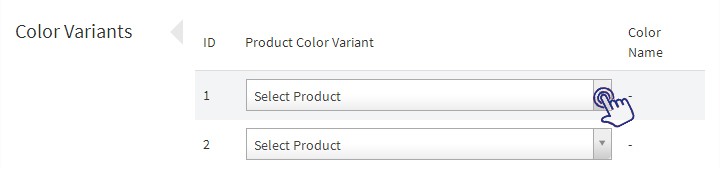
- Click "Save" and the product with available colours and their images will get displayed on your store.
Product Review Settings:
Tick the checkbox "Show product reviews" if you want to display the Submit Your Review form below each product displayed at your store asking customers to write a review for that particular product.
To display posted reviews below each product at your store:-
Select "Reports" option from the left Menu
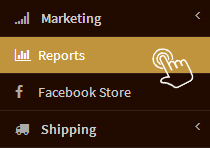
-
Click on "Product Reviews"

-
Click on “Edit” and the merchant can view the review
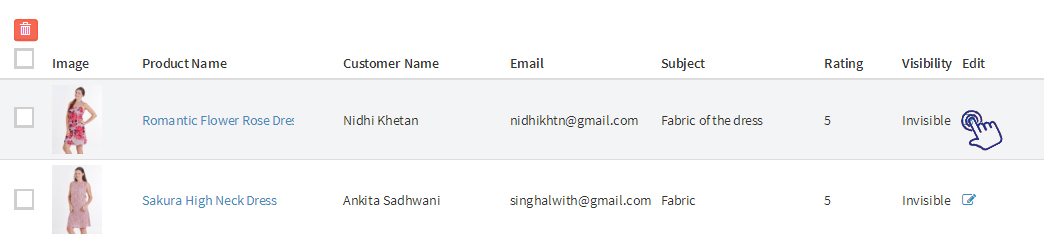
-
Change the status as VISIBLE and click on "Save" button and the selected review will get displayed near the product on your store.

- Click "Save" and the product with available colours and their images will get displayed on your store.
Register Settings:
Tick the checkbox "Send coupon to register customers". Mention the percentage of discount you want to offer and write the number of days for which the coupon is valid. An auto generated code will be sent via email to the Registered customers alongwith validity of code and percentage of discount offered.
Note:
The auto generated code will be sent only to the customers who have registered after "Register Settings have been enabled". The customers who have already registered before the Register Settings were enabled will not receive auto generated code.Wholesaler Settings
Enable Vendor selection on Products:
Tick the checkbox “Enable Vendor Selection on Products” if you are selling products procurred from different vendors/suppliers. This will help you to identify the products supplied by any particular vendor.
Enable B2B:
Tick the checkbox "Enable B2B" only if you are selling your products to another business instead of selling them directly to the customers. You can mention Wholesale Min Order Quantity and Wholesale Min Order Amount in Order Limits.
Order Limit(s)
Min Order Quantity:You can mention any numeric value in this column for all orders and restrict your customers from buying less quantity than minimum order quantity decided as per your store. For eg. The admin set's 4 as Min Order Quantity. The customer will not be able to place the order if he/she has selected less than 4 pcs in one single order.
Min Order Amount:
You can mention any amount in this column for all orders and restrict your customers from placing low value orders than minimum order Amount decided as per your store. For eg. The admin set's 500 as Min Order Amount. The customer will not be able to place the order if he/she has selected products less than total value of 500.
Note:
If the admin set's both - Minimum order quantity as well as Minimum order amount, then the customer should fulfill both the criteria while placing the final order.
Wholesale Min Order Quantity:
If you are into B2B business, you can mention any numeric value in this column and restrict your customers from buying less quantity than Wholesale Min order quantity decided as per your store. For eg. The admin set's 50 as Wholesale Min Order Quantity. The customer will not be able to place the order if he/she has selected less than 50 pcs in one single order.
Wholesale Min Order Amount:
If you are into B2B business, you can mention any amount in this column and restrict your customers from placing low value orders than Wholesale Min Order Amount decided as per your store. For eg. The admin set's 25000 as Wholesale Min Order Amount. The customer will not be able to place the order if he/she has selected products less than total value of 25000.
Note:
If the admin set's both - Wholesale minimum order quantity as well as wholesale minimum order amount, then the customer should fulfill both the criteria while placing the final order.
Ideal Customer(s):
Here you can mention the number of days after which the customer is considered as ideal customer. Ideal customers are the customers who have not purchased any item from number of days mentioned here.
- Click "Save"